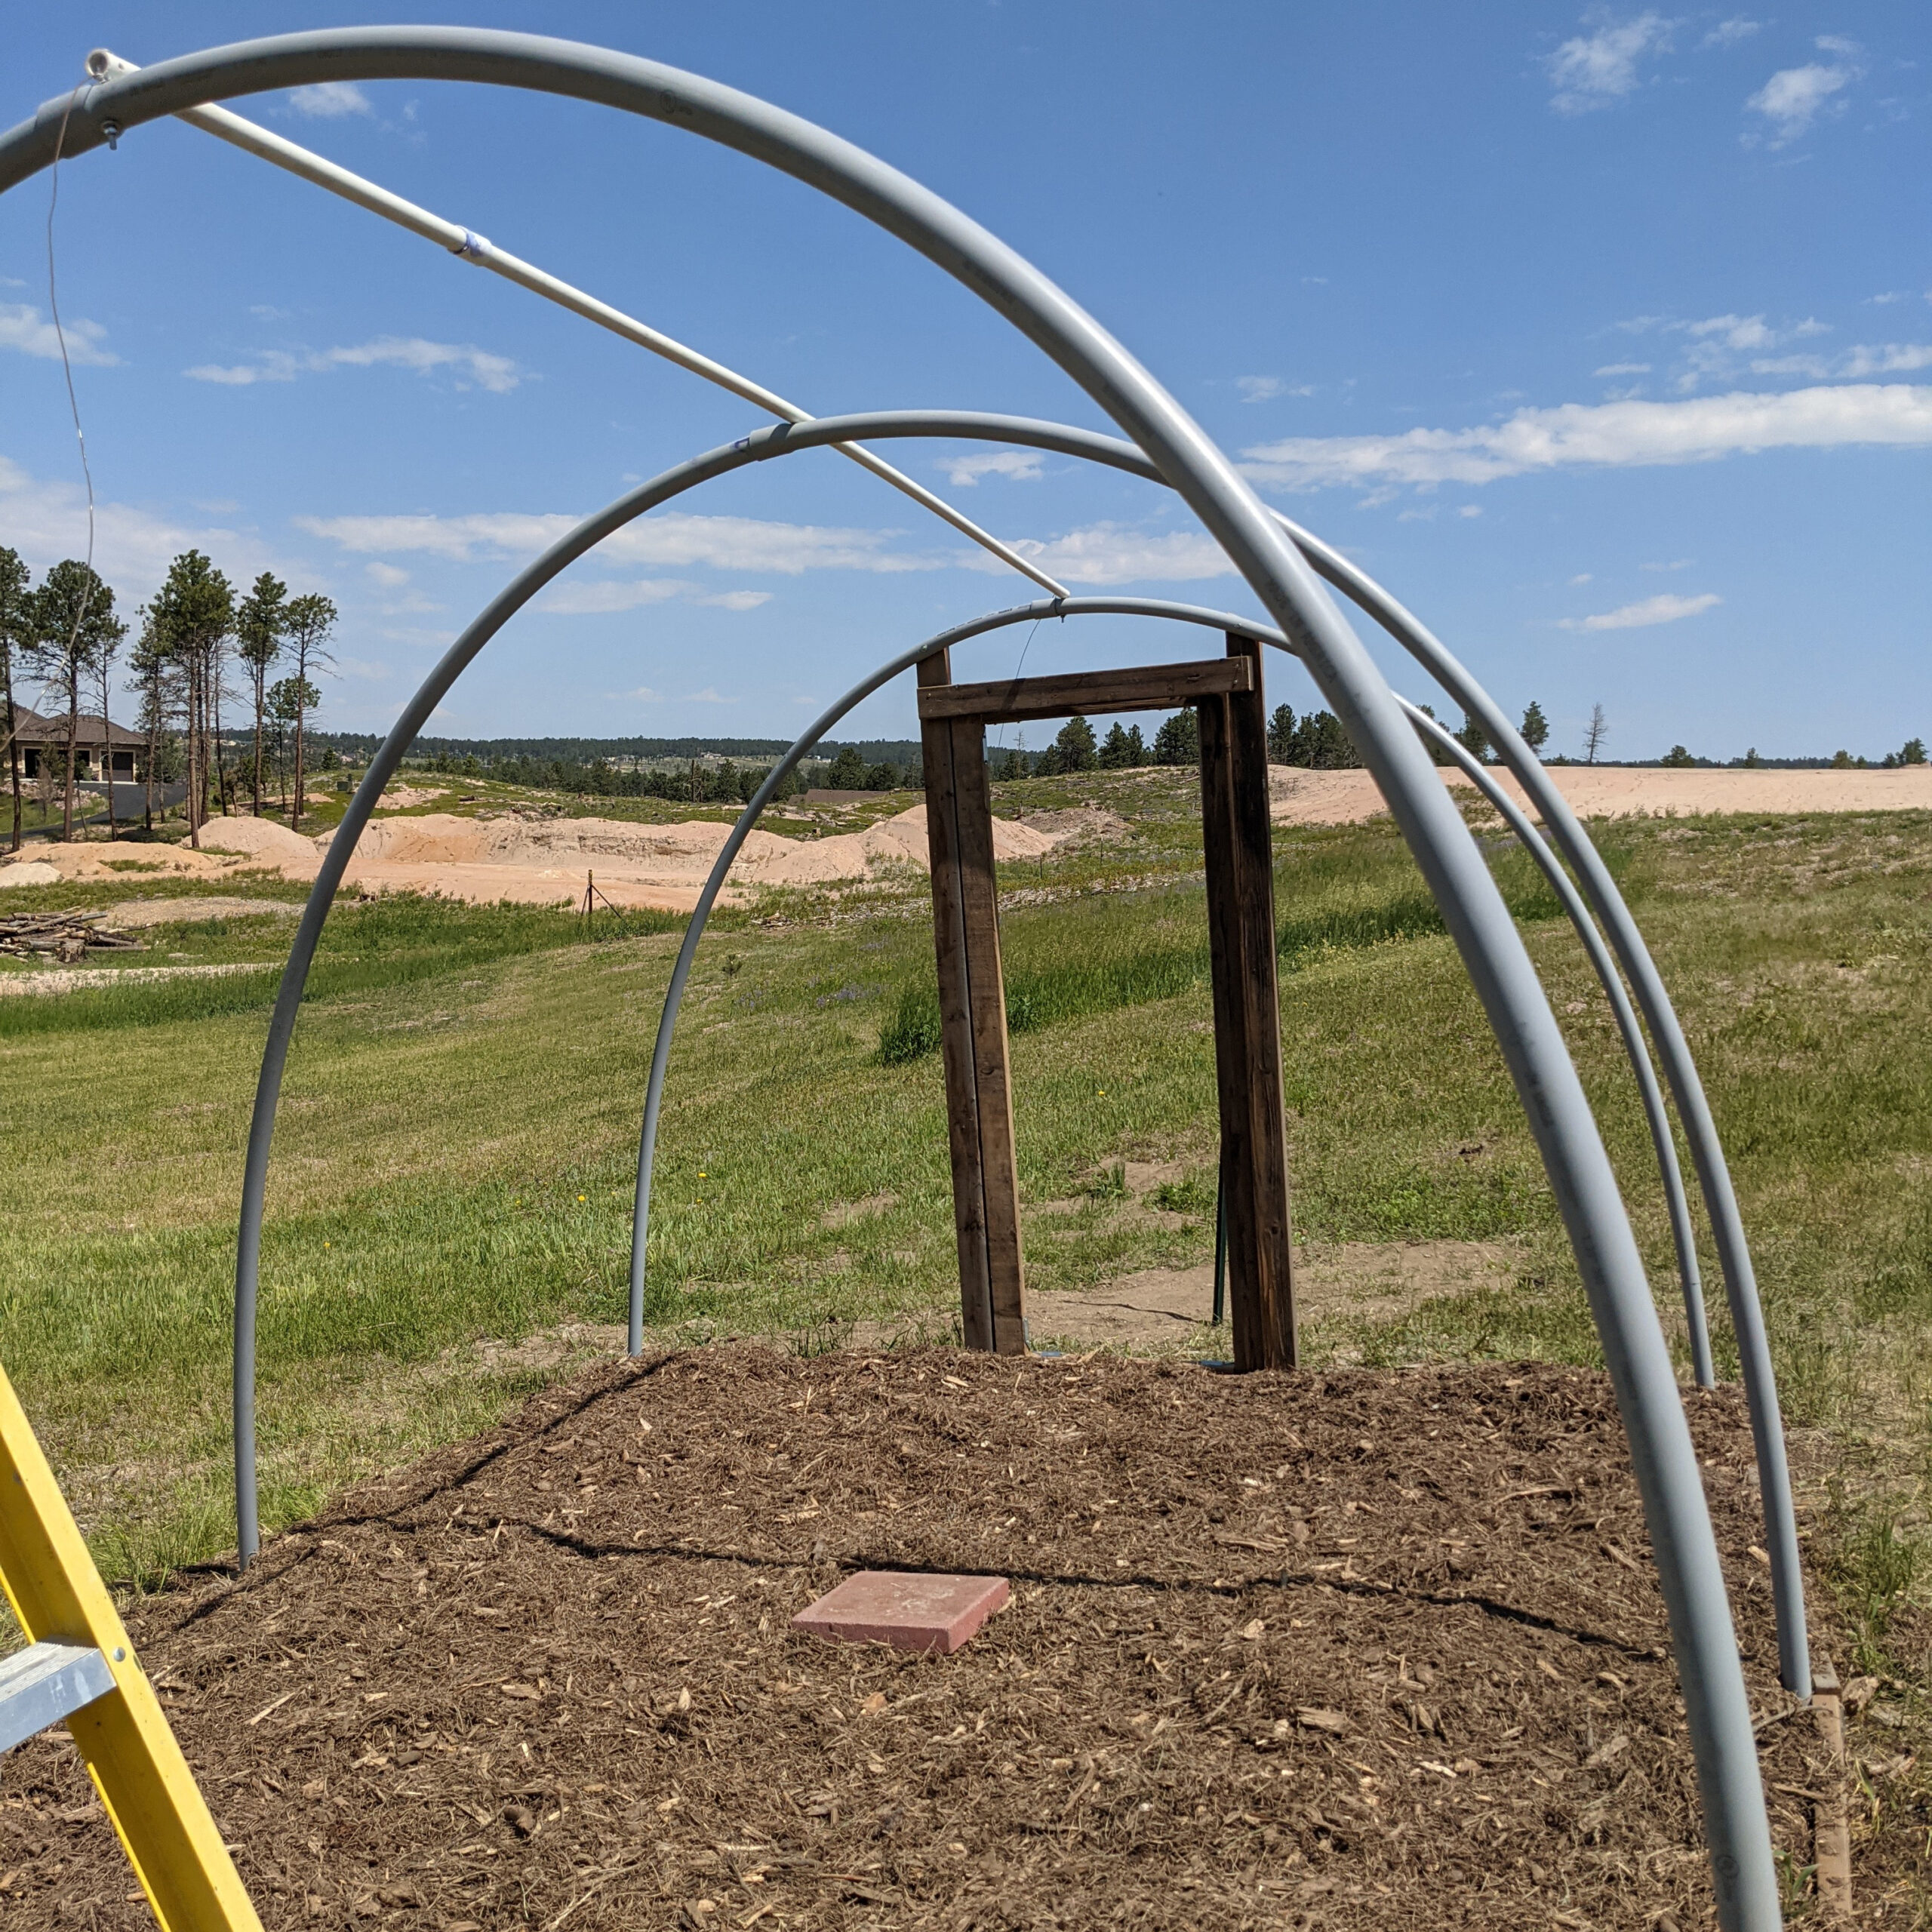
Our Conduit Arch garden uses two 10 foot pieces of 1 1/2 inch electrical PVC schedule 40 conduit for 20 feet of arch. Schedule 40 conduit is UV resistant, and the 1 1/2 inch diameter pipe allows us to create a taller, wider arch than the one we build over the small raised bed. The original design for this garden uses a 30 foot span of conduit for the arch, so it can be scaled up to a cover a wider garden than the cattle panel garden. We created this smaller version of the conduit arch to fit our space. Don, the builder of this garden, used 30 feet of conduit for the arches in his own garden. The details for this garden also include pictures of the larger version of the garden.
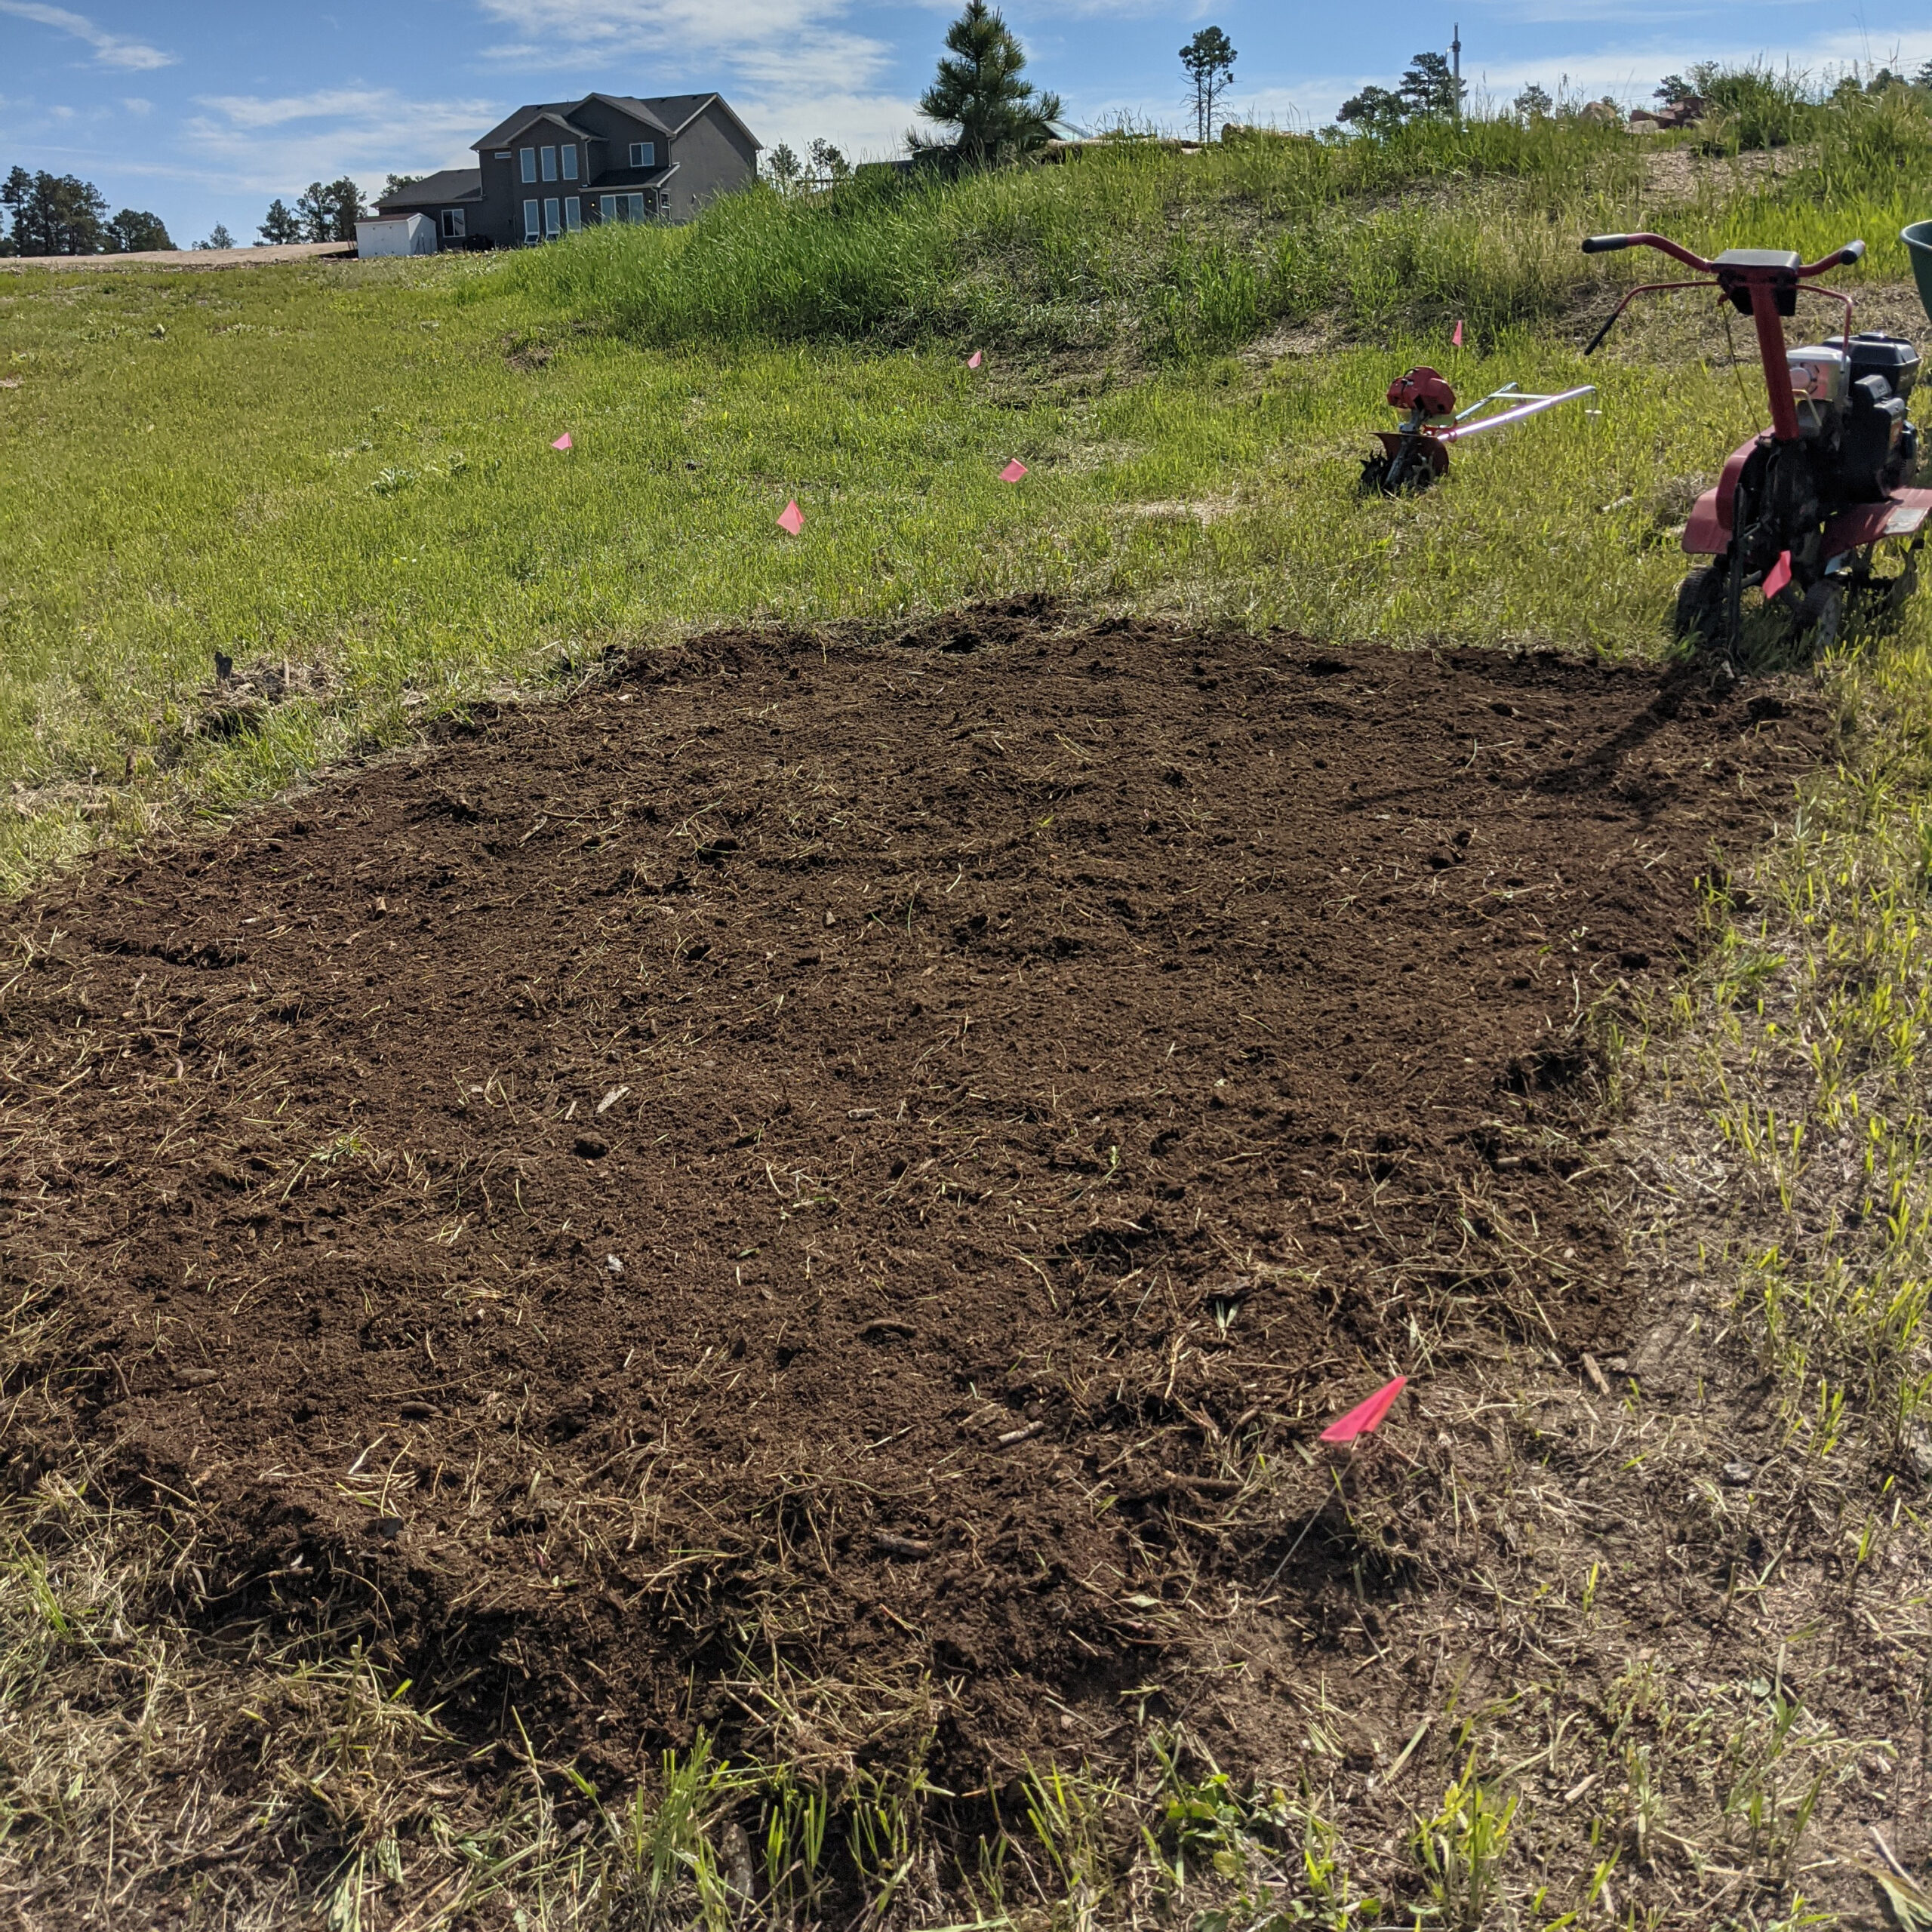
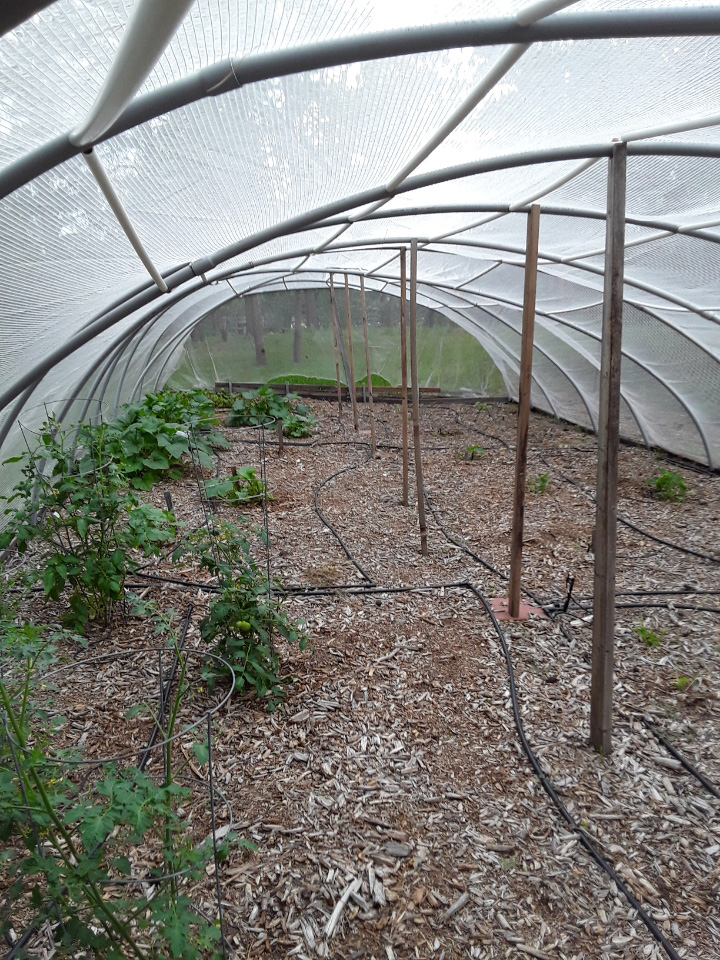
In this garden, we are using a technique called Back to Eden Gardening instead of a raised bed. It’s a popular approach here in Black Forest that makes great use of our local Slash and Mulch site.
This garden uses a modified Back to Eden gardening approach, which is technically a no-till technique. It works best when you start the soil and mulch layers in the fall so that the mulch has some time to break down before planting. Because we started this bed in early summer, we started the process by tilling in compost from Don’s Garden Supply. This gave us enriched soil to work with right away.
After tilling in the compost, we covered the bed with an 8-10 inch layer of mulch from Black Forest Slash and Mulch.
Prepare the ground
Use PVC cement to glue two pieces of conduit together. You don’t want the arches to twist at the joints.
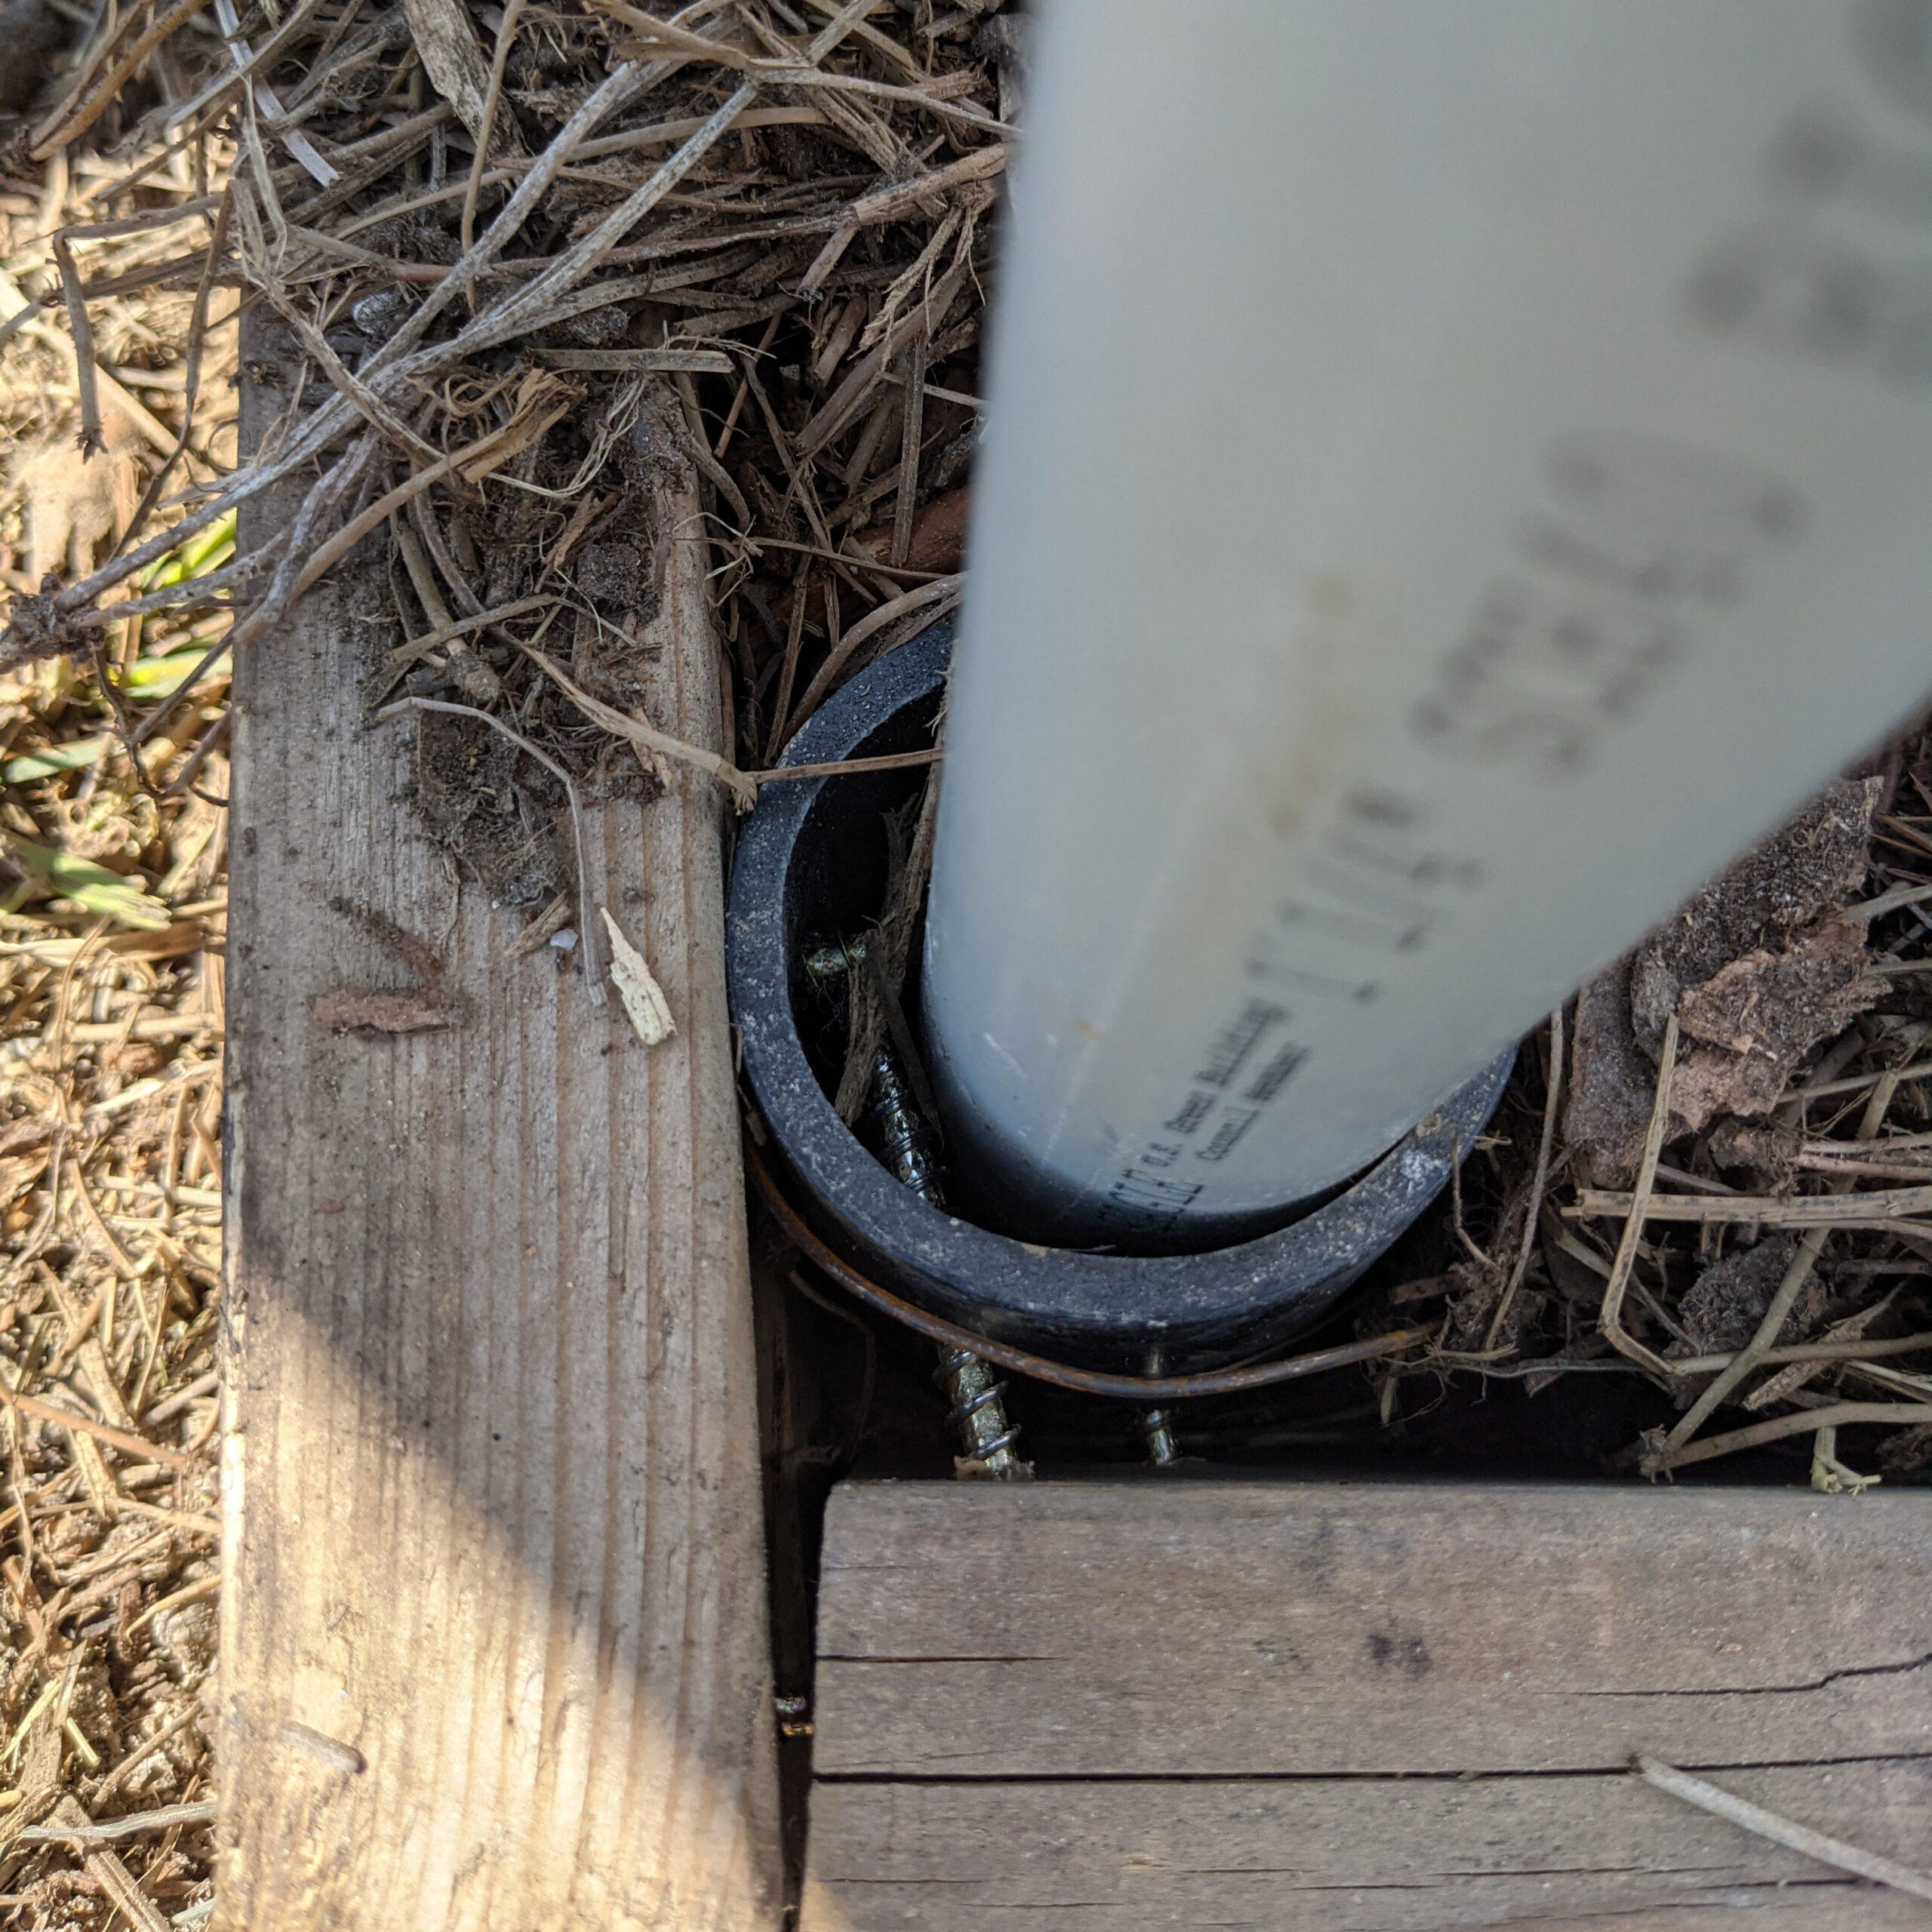
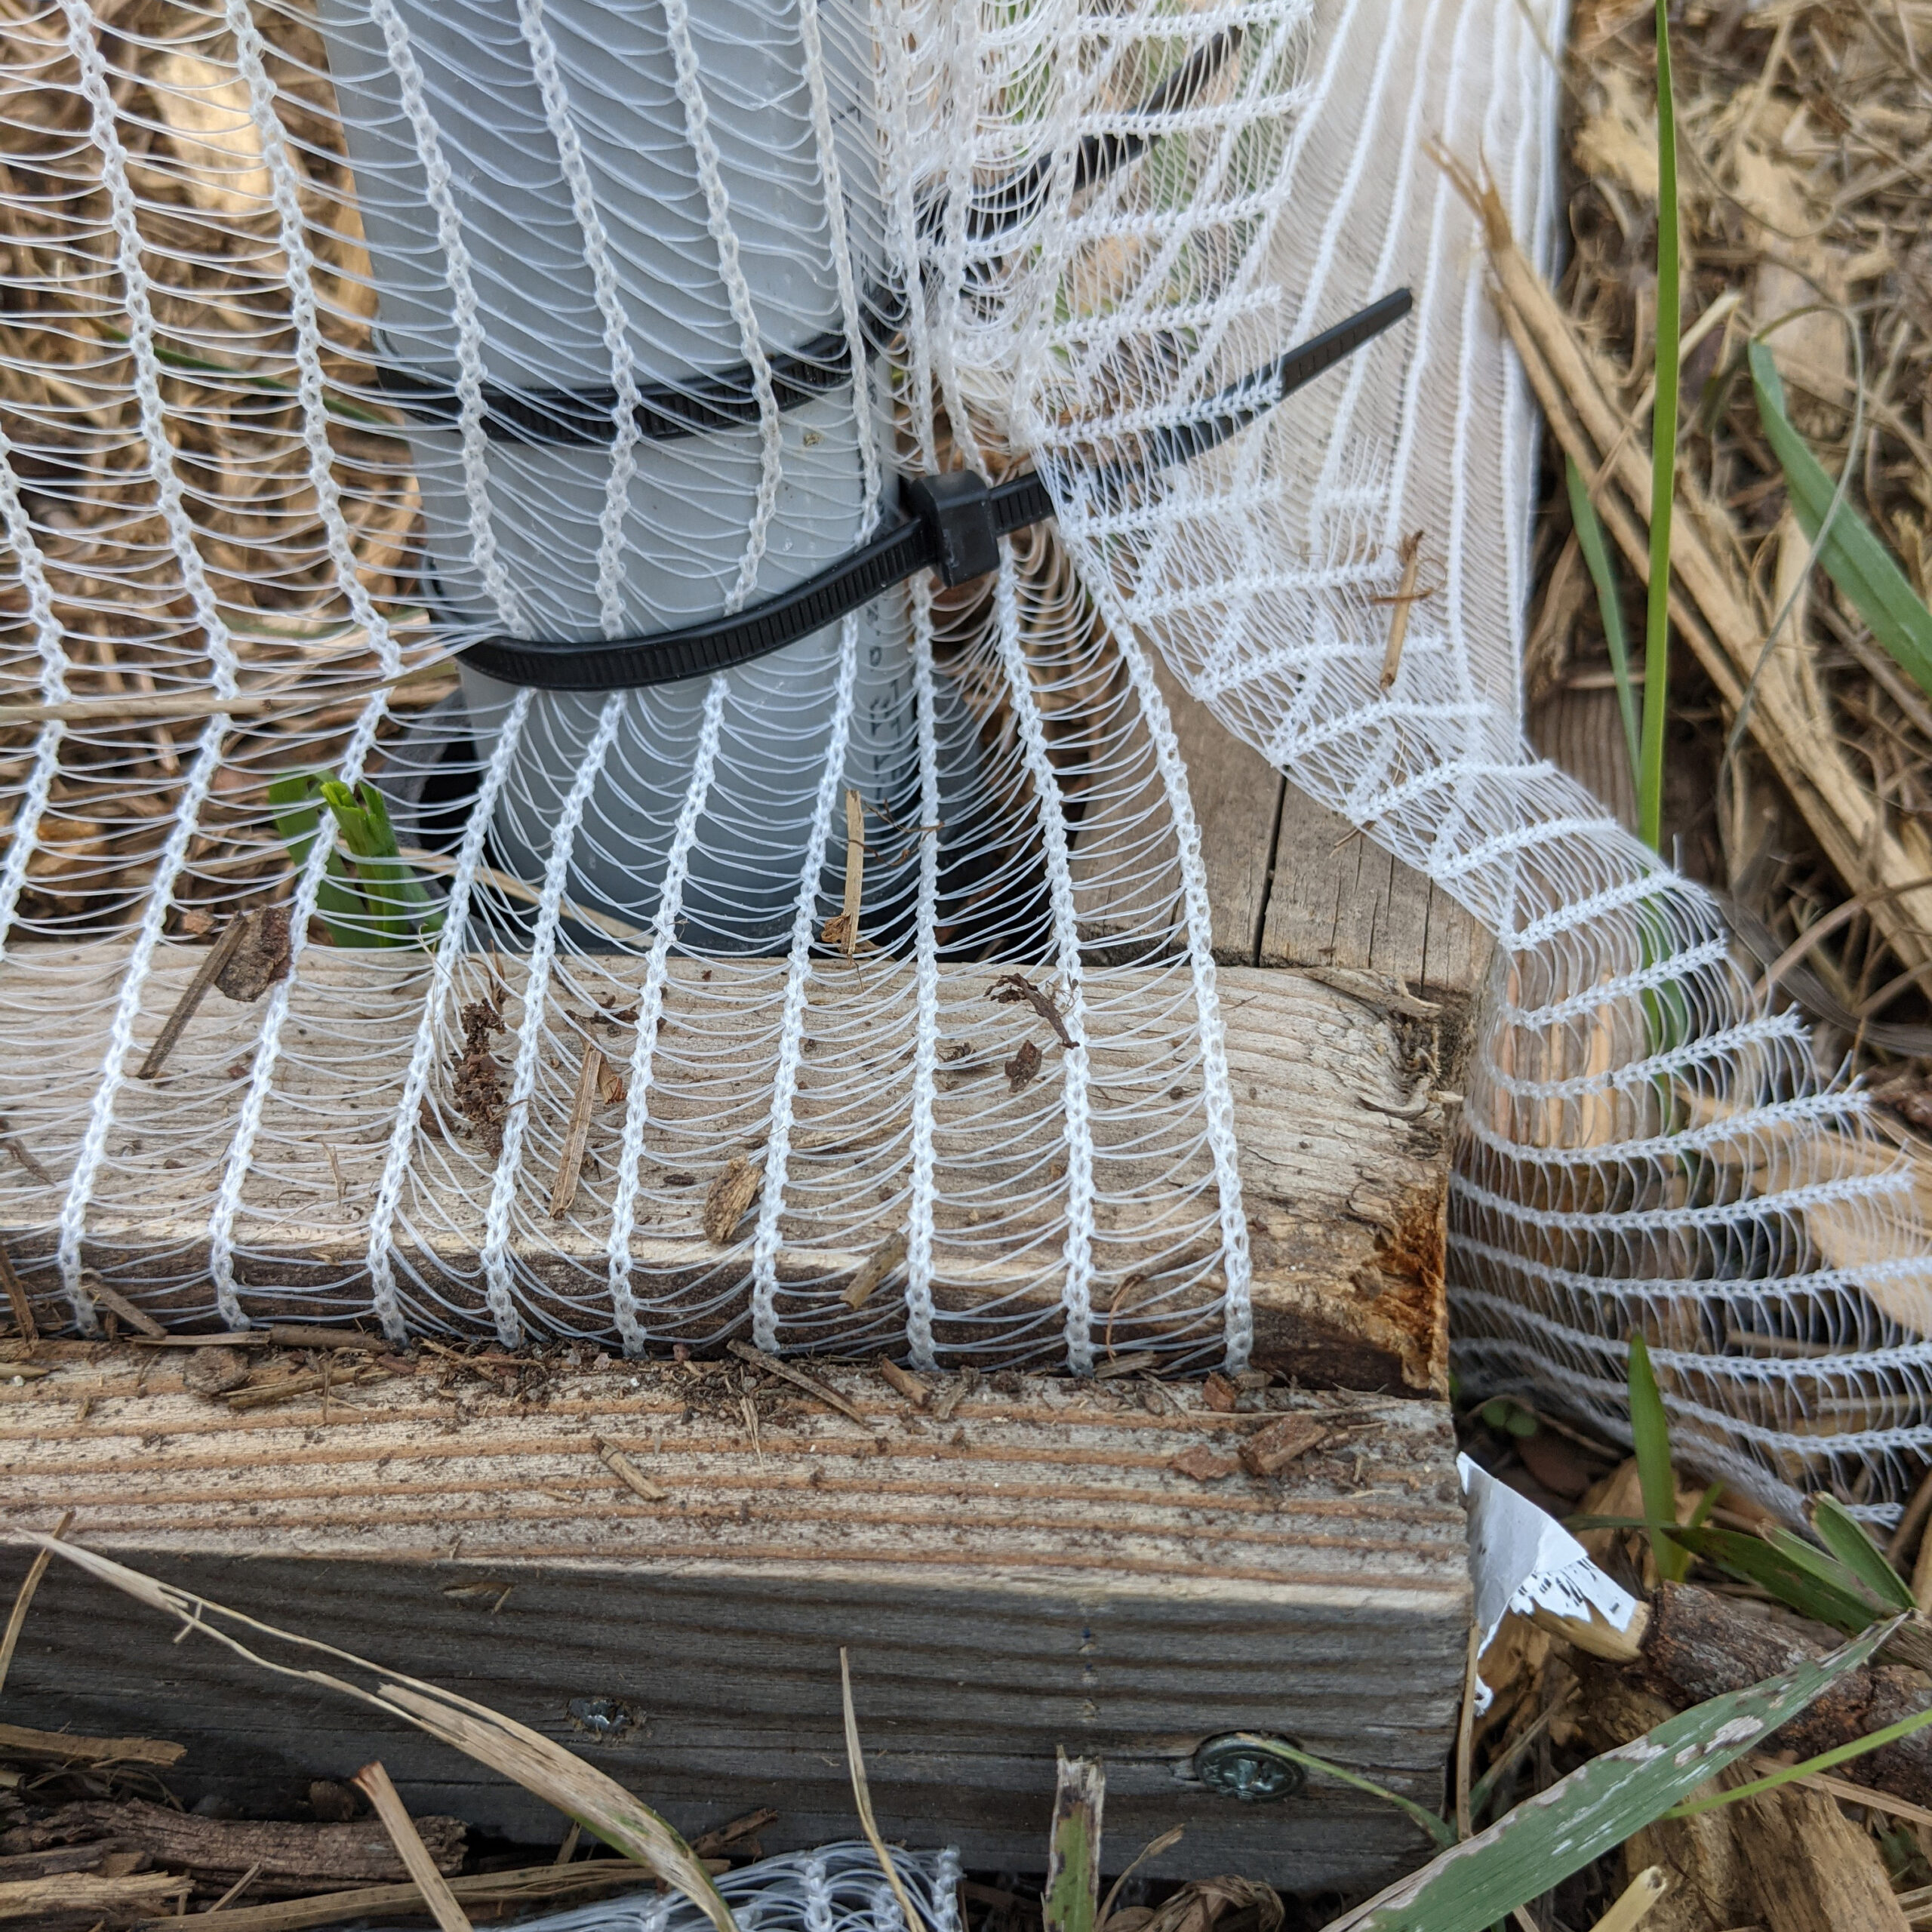
The conduit needs to be attached firmly in the ground, and as this is not a raised bed, we are not attaching it to a wood base. Install a support base where each pipe rests on the ground. We placed a wider diameter pipe a few inches in the ground and pounded rebar into the ground in the center of the pipe. Leave 8-10 inches of rebar standing out of the ground. Then slide the conduit onto the rebar and down into the larger pipe. Bend the conduit into an arch and repeat on the other side. Note the screws in the ground detail picture. This helps keep the pipe firmly attached.
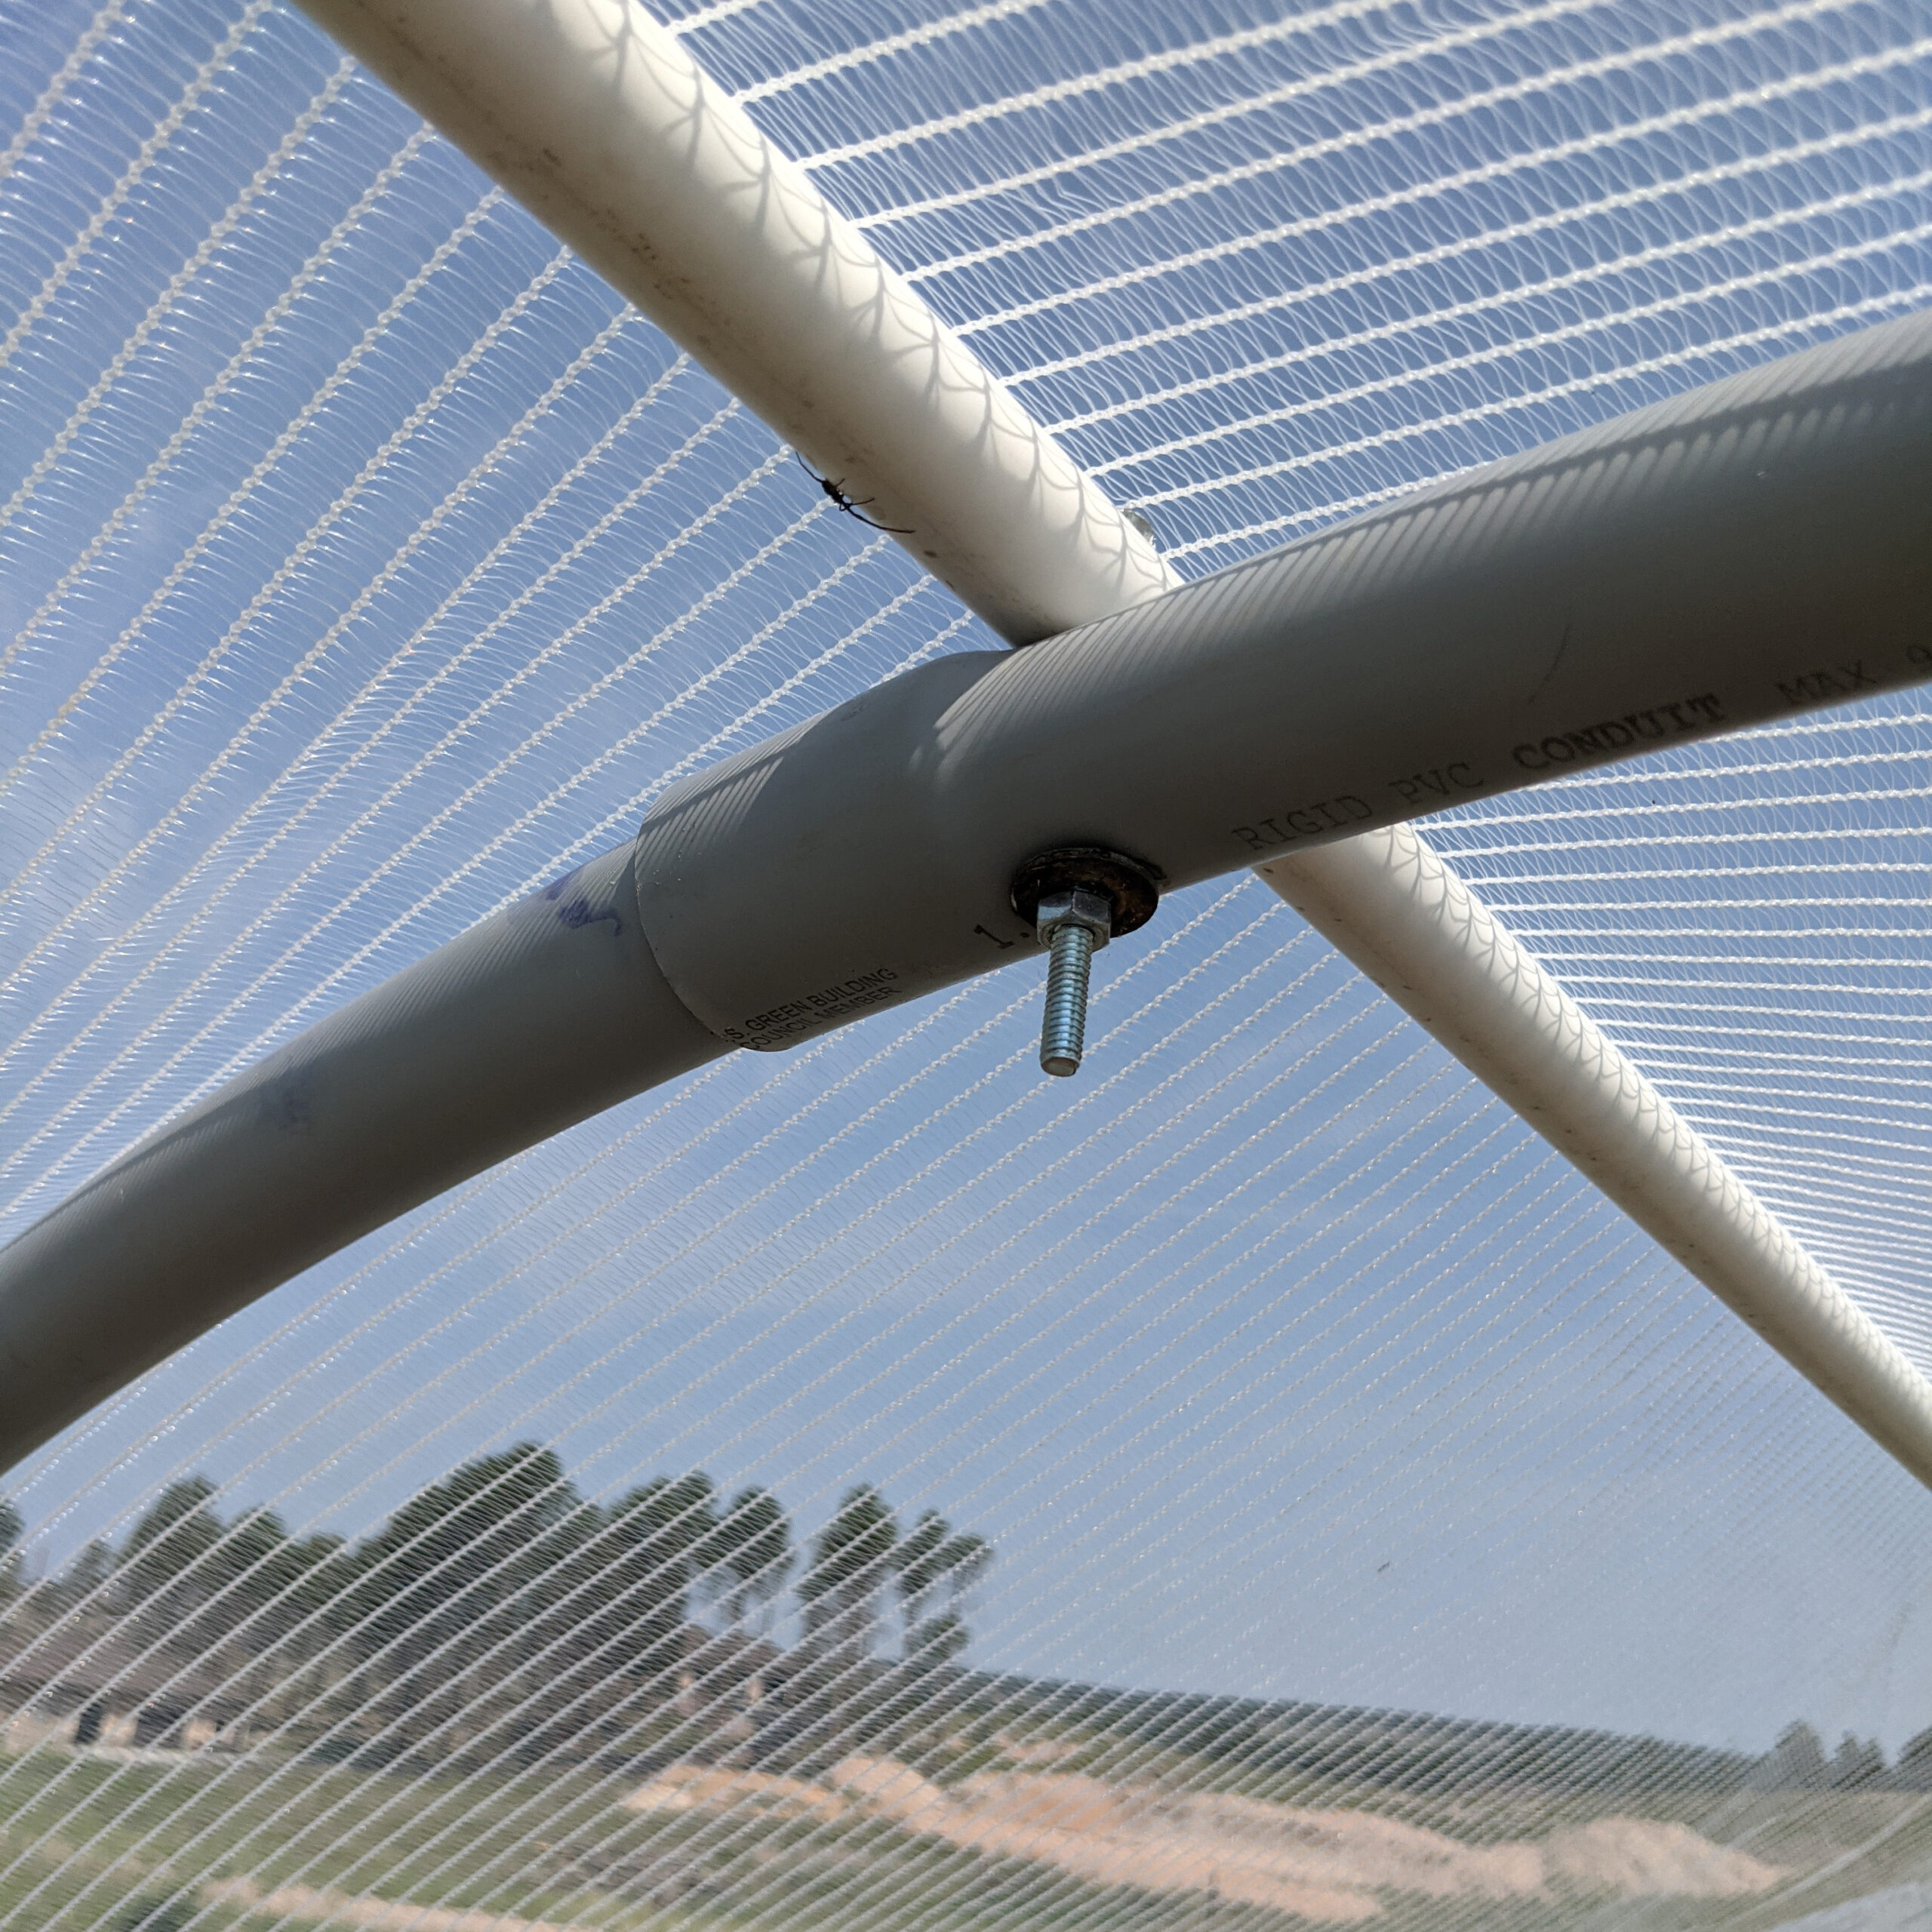
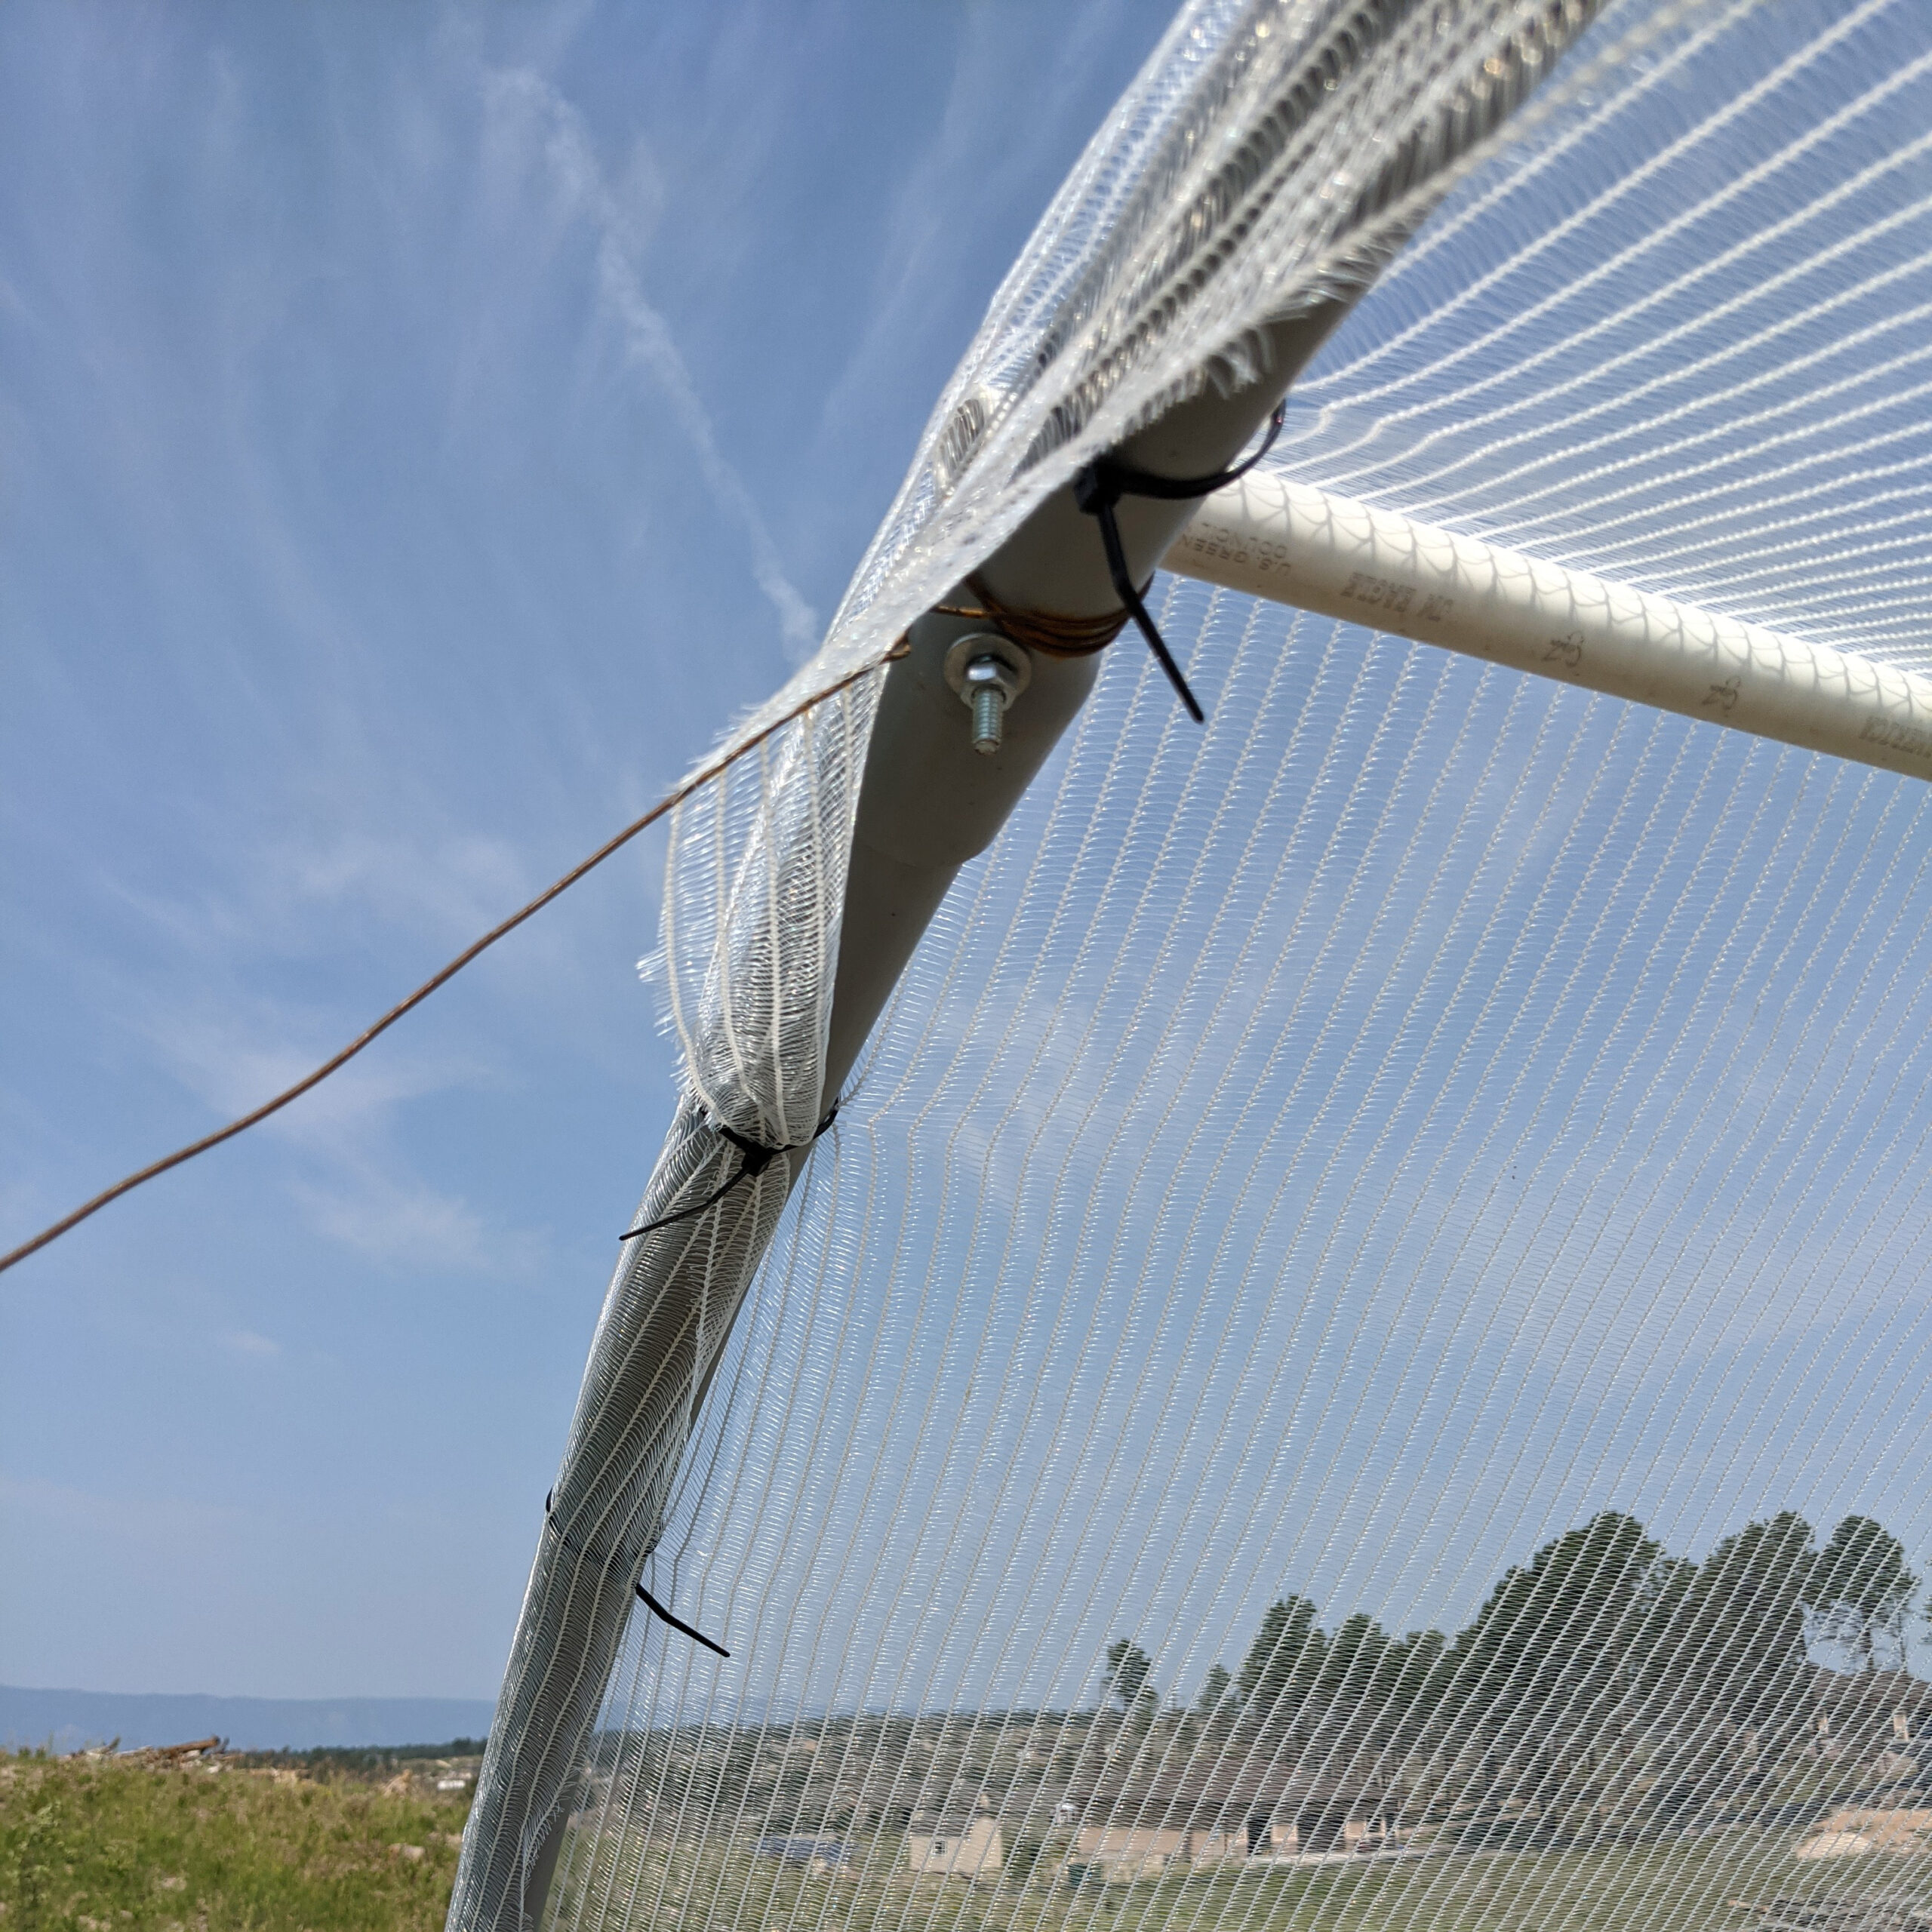
After the arches are installed, connect 1 inch diameter PVC along the top of the arches to keep the structure stable. This prevents the arches from swaying. This crossbar was made of two pieces of 1 inch regular PCV, cut to total the 12 foot (garden length) and cemented together with a 1 inch PVC pipe coupler. The Fastener Detail picture shows the connection between the top pipe and the arches. Drill a hole through the pipes and bolt them together. The top pipe is fastened to all three arches.
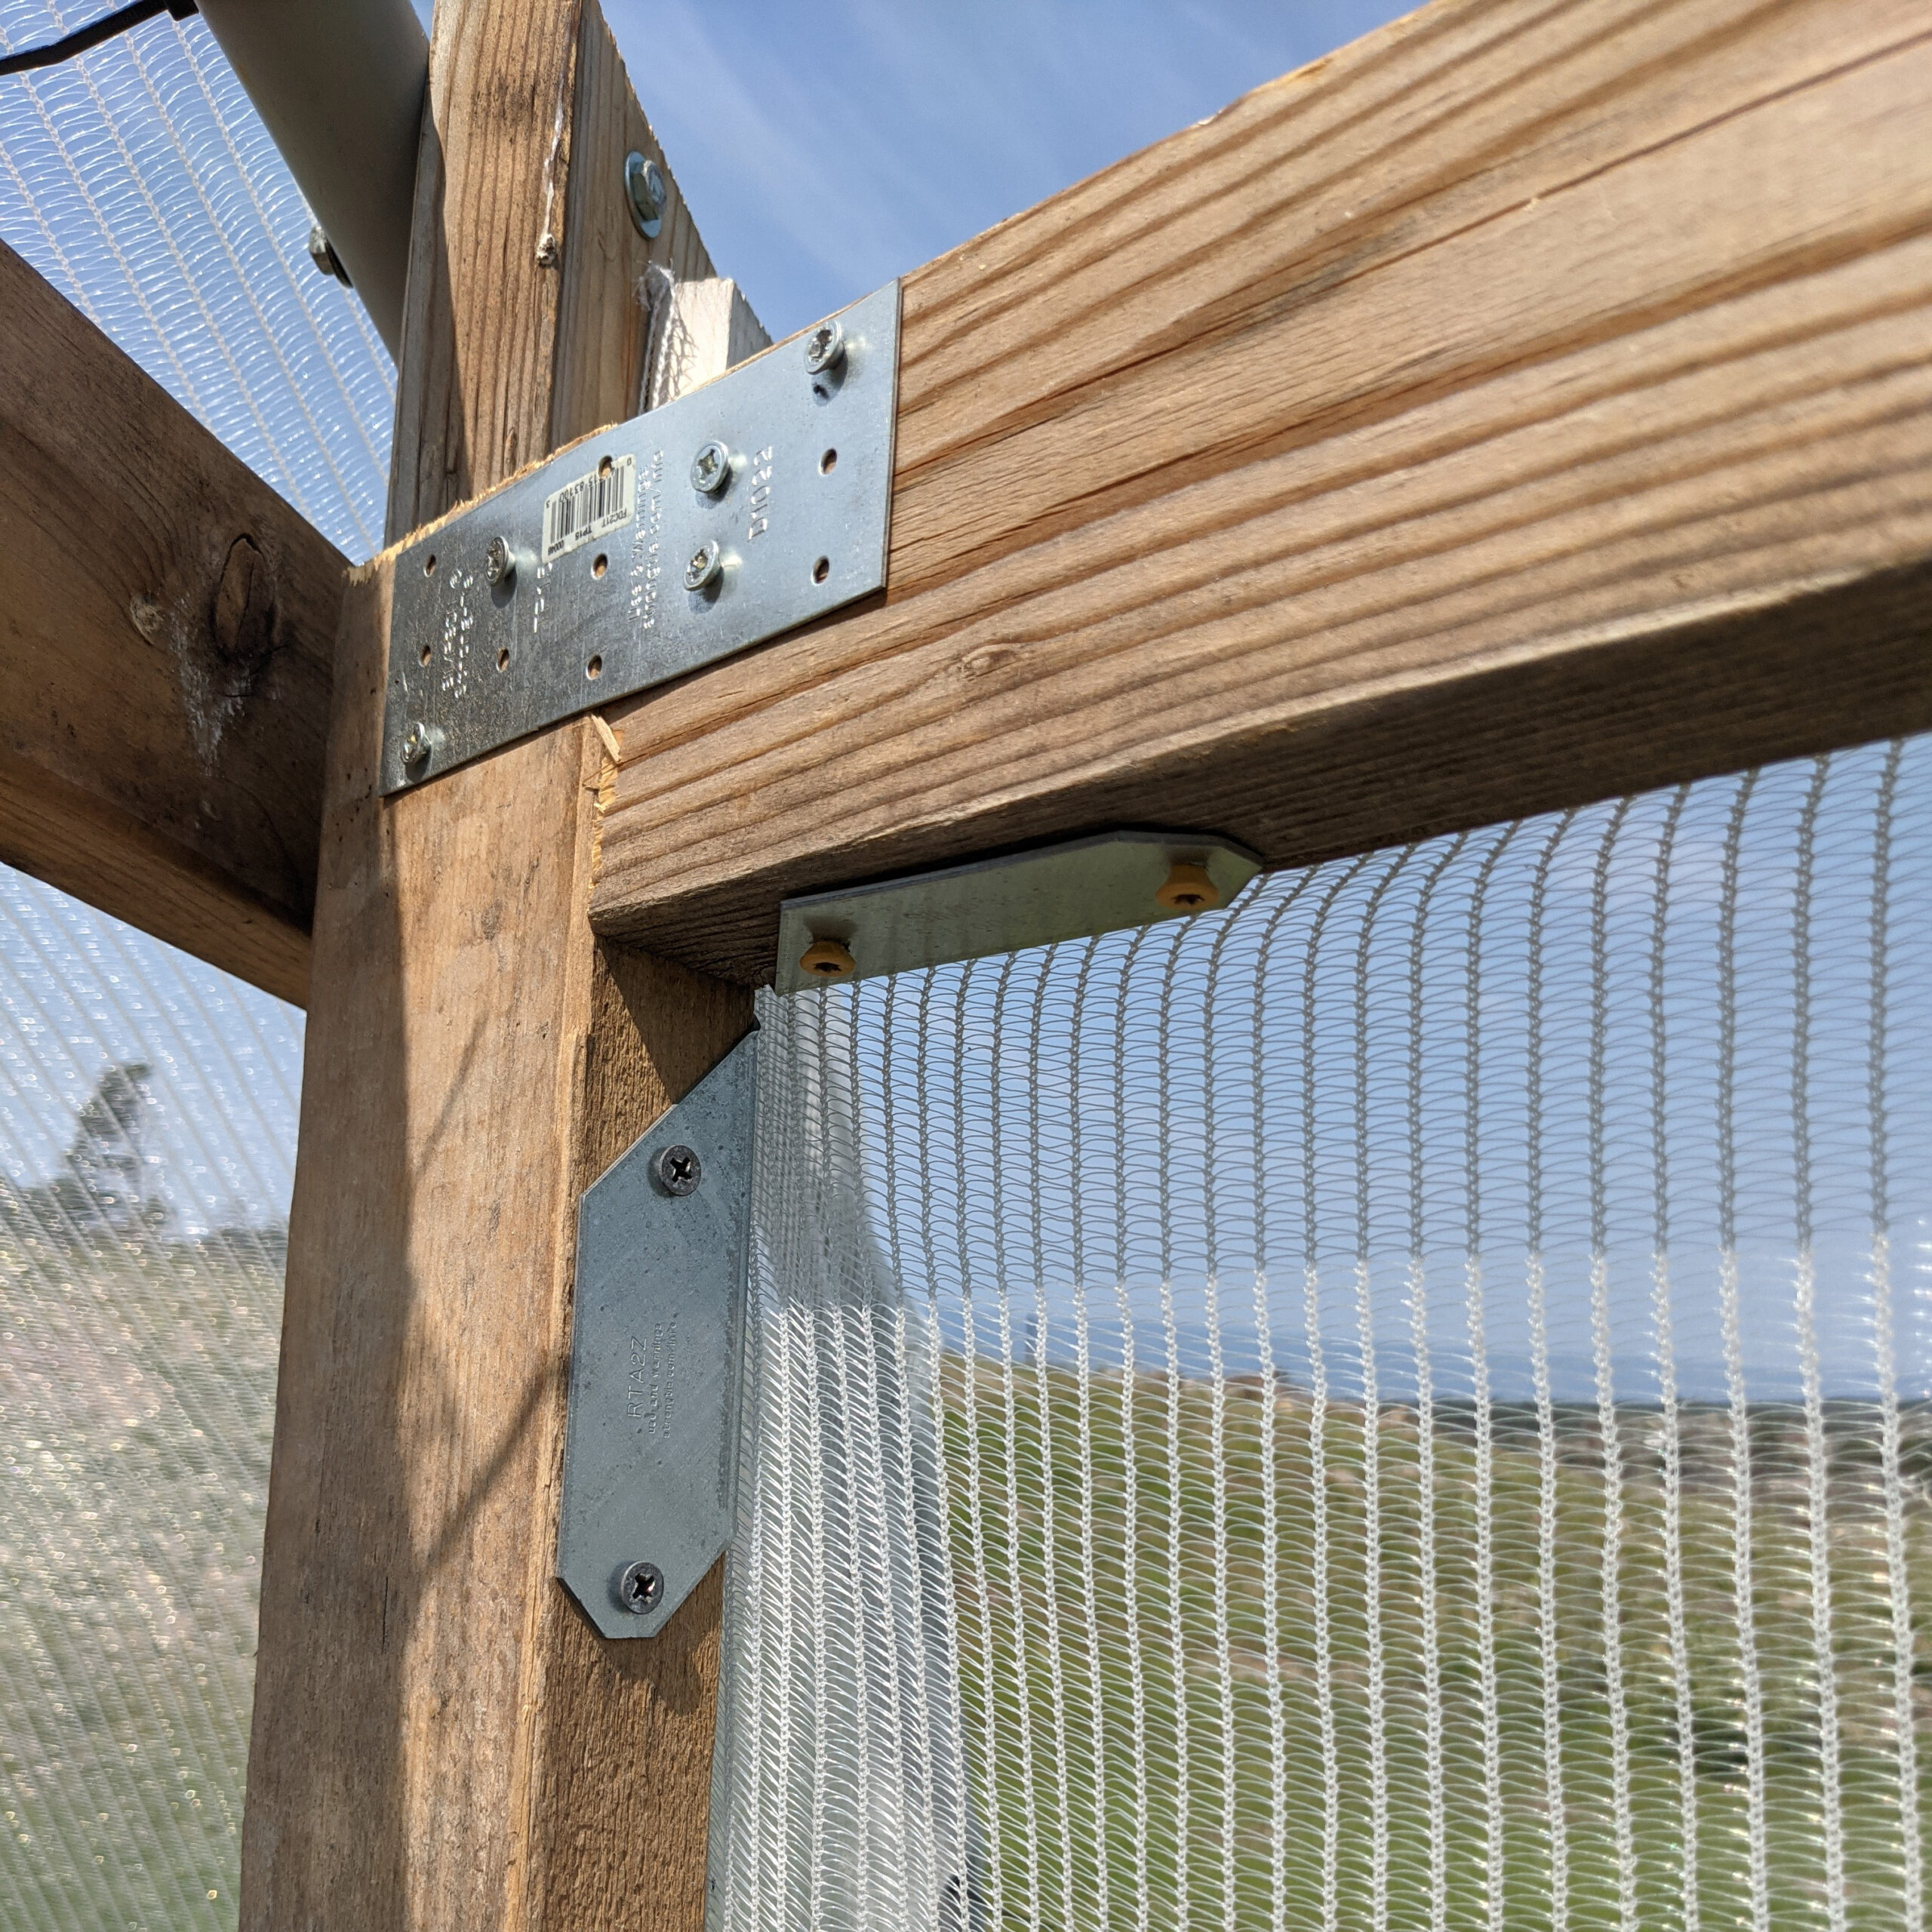
We framed out the bed with scrap 2x4s after the arches were complete. This wood surround creates a surface for attaching the hail cloth, but unlike the raised bed, it doesn’t really supply support the structure. It does support the door we built on one end of the arch.
Guy wires at both ends of the structure create additional support to keep the arches from moving back and forth. The wire was wrapped tightly at the arch and then attached to a t-post at each end of the garden.
Ground Detail
Aches showing crossbar
Fastener Detail
Guide Wire
Next, we built a door at one end of the garden. We attached two 2x4s, from the wood base to the arch. The Door Support picture shows how the wood was bolted to the arch. It was simply screwed into the wood at the base.
Door support
We attached a piece of wood across the back of the uprights for the door to close against. The door is a simple rectangular frame built to fit the opening.
Then we attached the door with hinges. A hook and eye latch keeps the door closed.
Door Frame Detail
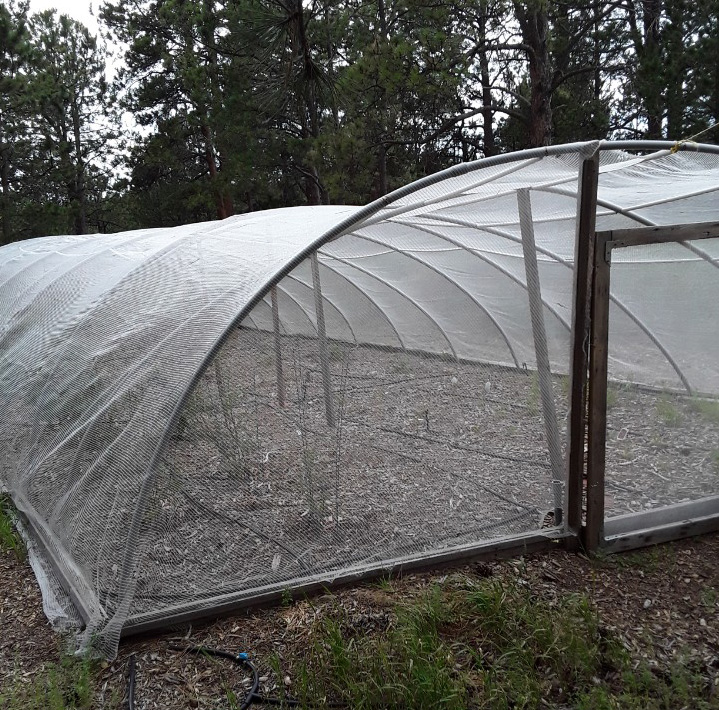
Once the structure was complete we covered with anti-hail netting. First, pull the largest section of netting over the arches and attach it with a few zip ties at both ends of the garden.
We then stretched the cloth down to the ground on both sides and secured it to the base with 1×2 scrap lumber.
We used the same technique to install the netting around the door. Attach netting to the arch with zip ties and then use scraps of lumber to secure to the uprights surrounding the door. For the door, cut a piece of netting and secure with 1×2 lumber.
Hail cloth detail
Our conduit arch used 2 pieces of pipe on each arch for a 20 foot span. This type of arch also works with over a larger garden. Connect 3 pieces of conduit for 30 feet of material. Installing the base 23 feet apart creates an 8 foot arch at the center.
We didn’t install center arch supports in our smaller demonstration garden. For this larger garden, install a support under each arch. Place a paving stone on the ground for a solid surface to rest the 2x4s. Cut a notch on the top end of the 2×4 so that the conduit rests in the lumber and then secure it with wire or pipe hanger tape.
Our demonstration garden has a single run of PVC pipe along the top of the arches. It connects the arches so they don’t sway back and forth. As the pictures show, this larger garden has a couple more rows of co 1/2 inch PVC connecting the arches to each other.
Large conduit garden
Center arch supports
This conduit arch garden bed is based on a design by Paul Smith of the Black Forest Victory Garden Club.